Procrastination at Its Best

What should I be doing right now? School work. What am I actually doing? Sitting on my computer, jammin’ to some some country music. I don’t know what brought it on, but I got into a really big country mood today. I blame Youtube. Or Pandora. Just today, I downloaded Some Hearts and Carnival Ride by Carrie and Same Trailer Different Park by Kacey Musgraves, who actually inspired today’s post.

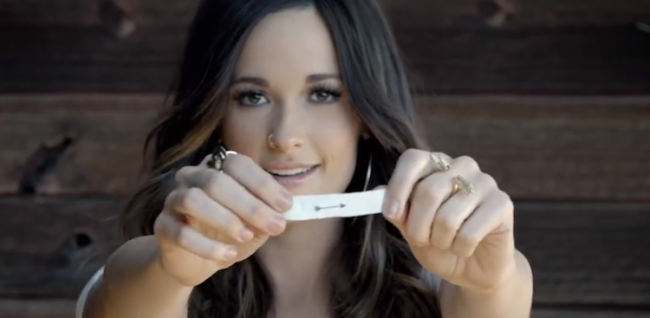
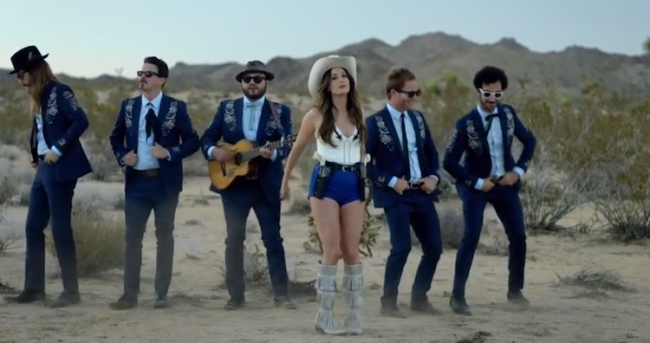
I heard Kacey on the radio a while back, but recently saw the music video for “Follow Your Arrow.” After watching the video, I was inspired by these screenshots to make a nail look.

Image

Image

With that, I present to you the nail look of the day!

DSC06127

I saw Ms. Musgraves  take out the arrow fortune, and thought it was the cutest thing! After the MV, I tried my best to come with an arrow that would be simple enough for me, but still looked cute. I’d say I was marginally successful. For my thumb and index and pinky fingers, I used Wet N Wild’s I Need a Refresh-Mint.

DSC06129

For my middle finger, I applied one coat of Julep’s Eden. On my pinky is 2/3 (I can’t remember) coats of Essie’s Beyond Cozy. And then for the arrow, I used Reverso from Circus by Andrea’s Choice, which I’m not really a big fan off.

DSC06130

DSC06136

DSC06131

Unfortunately, there was a little bit of smudging. I’m not sure if I didn’t wait long enough before applying my top coat (but really though, I waited over 30 minutes), if I didn’t have enough product on my brush, or if my top coat (Out the Door) just smudges easily.

What music are you currently really into? What top coat do you like best? Let me know in the comments!

♡ Melissa
What’s Cooler Than Bein’ Cool? Stone Cold!

In Texas lately, it’s been getting colder. So cold in fact that I didn’t have school last Friday (resulting in a 3 day week!) or today. While this only means that we will lose Memorial Day or Good Friday, or maybe even have a shorter Spring Break, I can’t bring myself to care. I’ll have to deal with that when the time comes.

In honor of this cold, snowy-but-not-really-snowy-but-snowy-enough-for-Texas weather, I decided to paint my nails with China Glaze’s Stone Cold, which is from their Hunger Games line from a couple of years ago. I got this color when the first movie was coming out, but kinda forgot about it.

DSC06121

It’s so hard for me to take these pics. I can never get the angle or placement of my hand right.

DSC06125

DSC06120

This color is a charcoal matte with teeny tiny pieces of glitter, that almost gives it a chalkboard feel.

DSC06117

The color was created for District 12, and is easily one of my favorites from the line.

DSC06118

This is the first matte polish I’ve ever owned, and it was strange for me to use in the beginning. It dried surprisingly fast, and still gives me trouble from time to time (as you can tell). Besides that, it’s gotten a little goopey since I keep my nail polish in a cabinet near my shower- which I know is bad because the steam and heat will ruin them, but I currently don’t have anywhere else to store them. Though it’s not my best, I wanted to get a post out because I have just fallen in love with the color all over again.

DSC06123

That’s it for another quickly-thrown-together update. I’m hoping to get a more cutesy/fun post out tomorrow, but we’ll see how it goes… It depends how much patience I have.

Do you have any colors from the China Glaze Hunger Games line? And, I know it’s wayy late, but what did you think of Catching Fire? I personally liked it much more than the first one, and am actually looking forward to the next one!

♡ Melissa

Manicure Monday: Konad m95 Plate x3

I hope that the title of this post isn’t deceiving… I didn’t use the plate three times in a single manicure or anything like that. I was just trying to be cute and clever and thought that since this is my third time using the plate, I could pull off a vague, poor musical reference (Yeah x3 by Breezy). Plus I didn’t really know what to call this manicure, and this is all that came to mind.

IMG_20131007_222431

DSC05897

The Prodcuts

  • Base Coat/ Top Coat- L.A. Colors Calcium Treatment/ Wet N Wild Fast Dry
  • Wine Red/Purplish Polish- OPI No Spain No Gain
  • Silver Polish- Sally Hansen Silver Sweep
  • Glitter Polish- Essie Beyond Cozy
  • White Stamping Polish*- Claire’s Stamping Kit
  • Konad m95 plate, stamper, gift card (scraper), and a napkin or piece of paper

*Instead of using a stamping polish, I usually go with a standard white polish, but that won’t EVER happen again! I’m not sure if you can tell, but in comparison to my other manicures, the white this time around is much more vibrant and opaque! People aren’t lying when they say to invest in a quality white/black stamping polish.

As you can see in my manicure, I didn’t let the stamping polish dry enough or the thin fast dry top coat smeared the design. I found that when I used the base coat, which is thicker, first, there was less smearing. Evidently, I have some serious issues with this, so if you have any recommendations on the best top coats to use or any techniques, let me knowwwww!!

Again, sorry for getting this post out a week late (on the bright side, it was posted on time on insta ;))! School’s just been crazy and so freaking demanding D:< I hope everyone enjoys the next few days of the week and has a great weekend!

♡ Melissa

Manicure Monday: Pink October

It’s been a long time comin’, but I’m here now. And I’m ’bout to set your… computer on fire (I’m sorry, I just had to). It’s  been October for some time now, and in honor of that, I came up with a Breast Cancer Awareness manicure! This manicure is quick and easy, and is actually from last last last Monday, so I’m sorry it’s just coming out now.

IMG_20130930_224655

My school’s H.O.S.A bracelet! “Big or Small Save Them All”

The Products

DSC05862

  • Base Coat/Top Coat- L.A. Colors Calcium Treatment/ Wet N Wild Fast Dry
  • White Polish- Circus by Andrea’s Choice Reverso
  • Light Pink Polish- Sinful Colors Beautiful Girl
  • Dark Pink Polish- Love & Beauty
  • Dotting Tool
  • Nail Polish “Palette”

The Procedure

  1. Apply a base coat and paint all nails, except the accent, dark pink.
  2. Paint the accent nail white.
  3. Wait for the white to dry completely.
  4. Take your palette, a plate or a lid, and add a few dabs of the light pink polish.
  5. Turn your hand towards you, where the cuticle is facing away from you.
  6. Using the dotting tool, dab it into the light pink polish and make an “X” shape on your nail. Once that is done, connect the top of the “X” to create the pink ribbon.
    • If your curve connecting the line looks too thick and closes the “gap” in the ribbon, wait for it to dry some and then apply a small dot of white polish.
  7. Wait for the design to dry completely and then add a top coat.

I’m sorry I don’t have pictures to accompany this tutorial- it’s impossible to do it with a single person, but hopefully my instructions are clear enough if you decide to try it out. If the there are any questions, feel free to comment and I’ll try to help you out!

♡ Melissa

Manicure Monday: Mixed Pattern Fall Nails

I meant to have this up Monday, but I was really exasperated with this manicure. And then I ever had time to get around to posting it until now.

IMG_20130923_214911

The Products

DSC05856

  • L.A. Colors Calcium Nail Treatment- Base/top coat
  • N.Y.C In a New York Color Minute in 248B Manhattan- Base Color
  • N.Y.C French Tip White- Stamping Polish
  • Konad Stamper and Scraper
  • Konad m95 Plate
  • Tools for clean up

The Procedure

Part of the reason I was annoyed with this nail look is that I couldn’t pick up the design at all. No matter how hard I pressed, it didn’t transfer onto the stamper. No matter what polish I used (I tried 3 different ones), I had no results. After realizing that I wasn’t working fast enough, my frustration cleared and I was able to do my nails in minutes.

  1. Paint nails with a base coat
  2. Paint nails two coats of a base color. If you’re using a fast dry polish like me, and it gets thick, try closing the bottle and shaking it after every couple of nails.
  3. Let that dry completely.
  4. Take a white polish and paint it on the design.
  5. Using the scraper, quickly remove the excess polish.
  6. Immediately after that, roll the stamper over the design and pick it up.
  7. Transfer the design onto your nail. Since you already have the design on the stamper, which is the most crucial step, you can take your time in stamping on the design.
  8. Repeat on all nails.
  9. Wait 5-10 minutes and apply a generous amount of top coat.
  10.  Using a polish remover and synthetic brush or q-tip clean up around your nails.

As you can see from the picture above, this isn’t my best work. The design is in no way even, but by this point, I was kind of fed up and just wanted to finish them.

Overall, I thought this design was perfect for fall because I used a dark, wine color. It also, has flowers, lace, and polka dots, which I feel like are always in,

I hope everyone has a great day!

♡ Melissa

Manicure Monday: Konad m95 Plate

I hoped to have a Manicure Monday up last week, but I didn’t have the time, so I’ll hop right into this one!

DSC05841

Right hand. The better of the two.

DSC05843

Left hand.

The Products

DSC05852

L.A. Colors Calcium Treatment/ Ulta In Hi-brr Nation/ NYC French Tip White/ Polish Remover/ Synthetic Brush/ Konad Stamper, Scraper, m95 Plate

The Procedure

  • Paint all your nails with a base coat.
  • Paint all your nails with two coats of your base color.
  • Using a white polish, apply it to the geometric design on the plate.
  • Using the scraper, scrape off excess polish.
  • Quickly use the stamper and roll/press it onto the design.
  • Quickly line up the stamper with your nail and roll it onto the nail.
  • Repeat on all your fingers.
  • Use polish remover and a synthetic brush to clean up.
  • Wait for the design to dry for a bit and apply a top coat. Letting the design dry will prevent smearing.

That’s it for this quick Mani Monday! I hope you enjoyed and that everyone has a lovely week!

PS. if you want to see the rest of the designs on this plate, be sure to check them out here.

♡ Melissa

Manicure Monday: Back to School Nails

I know its not Monday, but I wanted to get this out this out today so that I won’t have to worry about it tomorrow. This cute back to school look was inspired by both PackAPunchPolish and MissJenFabulous. I took aspects from both Youtubers’ videos and threw them together.

PhotoGrid_1377459332472

The Products

DSC05752

Polishes: Base/Top Coat, White, Light Pink, Yellow, Silver, Blue, and Red
Brushes: Nail Stripers/Paint Brushes and a Synthetic Brush
Other: Newspaper Scraps, A small container with water, Polish Remover, and a Fan (optional)

  • Base/Top- L.A. Colors Calcium Treatment
  • White- Circus by Andrea’s Choice Reverso
  • Light Pink- Sinful Colors Beautiful Girl
  • Yellow- Julep Abbie
  • Silver- Sally Hansen Insta-Dry Silver Sweep
  • Blue- Sally Hansen Calypso Blue
  • Red- Orchid Sugar and Spice and Nothing Nice

The Procedure

The Thumb: Pencil Nails

  • Paint your thumbs with a base coat. Follow with two coats of a light pink polish. This will be the eraser. Let dry (90%) before continuing. To speed up the drying process, I like to use a fan.

DSC05747

  • Paint half the thumb with one coat a yellow polish. You can add another if you need too, but be cautious, it can get a little thick, which means the manicure won’t last as long. It doesn’t have to be perfectly even; we’ll cover it up. This will be the actual pencil. Once again let it dry before moving on.

DSC05748

  • Take a silver polish and make a horizontal stripe between the yellow and pink. I used a separate paint brush because it gives me more control, but you can just use the brush that comes with the polish. If I’m using a brush or nail striper, I run it under water, press out some water, and smooth the hairs together before dipping it in the polish.  This is the metal piece that holds the eraser.

DSC05749

  • Take the same yellow (or peach or black) and make three medium sized vertical lines from the silver stripe down to the tip of the nail. This creates the shadows of the ridges on the pencil. I was able to use the same color because the yellow on top of the pink became a darker, mustard yellow.
DSC05780

These stripes are thicker than I would like, but I’m too lazy to fix it, again.

  • Let dry and finish it off with a top coat.
  • Use polish remover and a synthetic brush to clean up.

The Rest of the Nails: Notebook Newspaper Nails

  • Start off with a base coat. Follow that white two coats of a white base.

DSC05728 copy

  • Wait for that to completely dry before continuing with the newspaper part.
  • Make sure you cut your newspaper in strips that are roughly the size of your finger, but long enough to hold on the sides.

DSC05750

  • Dip the strips of paper in the water for a couple of seconds.

IMG_20130825_081318 copy

  • Place the paper on your nails, hold it down on the sides, and press down firmly. I pressed pretty hard; the harder you press, the darker the print. Repeat on the rest of your nails.
This piece isn't wet; it's just for demonstration.

This piece isn’t wet; it’s just for demonstration. Once you have it in place, press firmly all over the nail.

  • Wait a little bit, maybe 10 minutes and apply a top coat. This is optional. I just chose to do this because the ink was already fading as it was, and I wanted to seal the design before it all rubbed off.
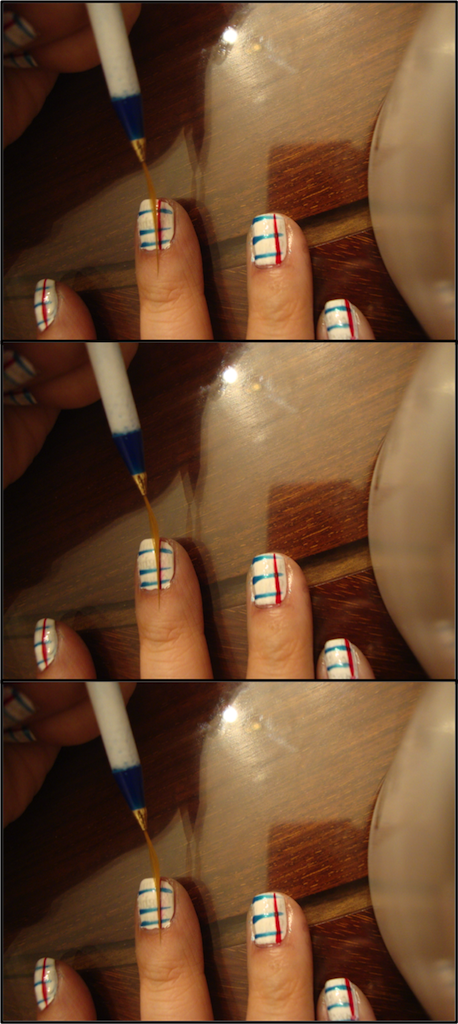
  • Take a blue polish/paint and a striper/brush and paint horizontal lines between the words on each nail. To make the lines, place the striper on your nails and slowly roll your finger towards you.

DSC05772

  • Taking a clean brush/striper paint one red vertical line on the right side of your nail. When you paint it on the right side, it’ll be on the left side when facing others.

Red Stripe

  • Let dry and finish with a top coat.
  • Clean with polish remover and a brush.

And there you go! My back to school nails! This is probably the most time consuming and frustrating manicure I’ve ever attempted. I came across numerous problems. The newspaper nails didn’t turn out nice, so I redid them, and they still suck. I had to redo the thumbs a bajillion times because I didn’t wait long enough for the paint to dry or I smudged them. I also redid the stripes (on the pencil) countless times, and I’m still unhappy with them. Though I don’t like many individual parts of this manicure, I really do like the finished product!

It took me numerous tries and different techniques to complete this look, but I’m hoping that the second time around, I won’t have to deal with any mishaps. Hopefully this tutorial will take some of the guessing and experimenting out of the process if you decide to try out this look!

I hope you guys enjoyed this post and have a good first day of school (for those starting tomorrow)!

♡ Melissa
Manicure Monday: Ombre Nails Take 2

I meant to have this up yesterday, but was busy with volunteering at school followed by a birthday party at Del Frisco’s.

I’ve done ombre nails before, but decided to give it another shot, with a new technique. This time around, I think my nails came out much better! Overall, I’m very happy with the results.

IMG_20130811_171847

The Products:

L.A. Colors Calcium Treatment/ NYC French Tip White/ Julep Eden/ Wet n Wild I Need a Refresh-Mint/ Orchid Twist of Lime/ Makeup Sponge

L.A. Colors Calcium Treatment/ NYC French Tip White/ Julep Eden/ Wet n Wild I Need a Refresh-Mint/ Orchid Twist of Lime/ Makeup Sponge

DSC04865

Polish Remover/ Synthetic Brush/ Q-tip (optional)

The Procedure:

  • Paint all your nails with a base coat to protect your nails. Then, paint on a white base; this will make the colors pop and more opaque.

DSC05728

  • Wait for the base color to completely dry. Then, unscrew the lid on the three colors for easy access. Take your makeup sponge and apply the first color and the last color on the sponge on half of the length of the sponge. Then, paint the second color in between the other two colors. This will create a better gradient because the the colors will blend together.
DSC05729

I use the left side of the sponge for my left hand and the right side for my right hand.

  • Line up the sponge with your finger. Then using a rolling motion, keep your finger still and move the sponge. Depending on how much polish you use, you may have to do this 1-2 times.

Ombre

  • Once you finish a nail, apply top coat. This will smooth out the design and make the colors blend flawlessly!
  • Repeat steps 2-4 on each nail.
  • Once all your nails are done, clean up your skin with polish remover and a brush/Q-tip.

That’s it for this Manicure Monday! I actually planned on stamping on a design from my Konad m95 plate, but as I was testing it for a review, it came out horrible, so I decided to go without it.

I hope that this tutorial was somewhat helpful and if you have any questions, you can comment below or email me! If you try out this manicure, please tag me at @lilkwazylau on instagram!

I hope that everyone enjoys the rest of the week!

~Melissa

Manicure Monday: DIY Sugar Nails

Hey guys! First off, I just wanted to say that I hope that everyone is having a safe and fun summer!

Anyways, I know that it’s been forever since I’ve done a MM, but lately I’ve been uninspired and lazy. Luckily, I saw this video by RealAsianBeauty on Youtube. Prior to this video, she posted one with salt, which basically gives the same effect, but I like the sugar one more. If you follow me on instagram, you saw these nails earlier today, but unfortunately, I had some malware problems,that have been resolved, that were preventing me from updating my blog.

IMG_20130701_172713

The Products:

DSC05606

DSC05604

  • Polishes: Julep Abbie, Covergirl Lav-Endure, Covergirl Peaches and Cream, Wet n Wild Mint, Essie Cute As A Button, NYC Top Coat (also my base coat), and NYC Matte Me Crazy Top Coat

*My matte top coat, Matte Me Crazy was purchased at my local Wal-Mart for $1.99

  • Sugar
  • A small container/bowl

The Procedure:

  1. Paint all your nails with a base coat.
  2. Paint each finger with 1-2 coats of each colored polish. I personally did two coats each, but it’s not necessary. It might be better if you only applied one coat because it’ll prevent the polish from getting thick like mine did.
  3. Next, paint your first finger with a generous amount of top coat. You want a pretty decent coat because this is going to be your “glue”.
  4. After applying the top coat, immediately press your nail flat into the sugar. In the video, Kristina says that you can either pour the sugar on or dip your finger in it. I tried both and found that pressing it into the sugar is easier because you get even coverage. Also, try not to go too crazy. I tried to make sure that I covered all of my nail, even the sides, which added extra sugar, and contributed to them being kinda thick.
  5. Repeat steps 3 & 4 on all your fingers.
  6. Once you have sugar coated all your fingers, apply a coat of matte top coat. I didn’t think one coat sealed in the sugar enough, so I added another.

The Outcome:

https://www.instagram.com/p/bPXgoKIw7_

These nails are surprisingly easy to do. There isn’t too much fuss or mess. Obviously, you can’t expect them to last that long, sugar is landing on my keyboard as I type. I give them two days max. Unfortunately, the sugar will probably come off on your sheets when you sleep and I find that my fingers sometimes get sticky if my hands are wet because despite the top coat, the sugar will still dissolve. All in all, I think these nails are really cute and definitely worth a try if you want to try something different.

So, that’s it for this week’s Manicure Monday! I hope you guys enjoyed and I hopefully I’ll have another one up next week!

Do you have any easy DIY nail art tricks? Share them below!

~Melissa

Manicure Monday: The Great Gatsby

I really shouldn’t be posting this. I should be working on my AP Stats or AP Chem project. I know, right? Who gives projects? It’s the flippin’ year end of the year! But I can’t help myself because today, I took a field trip to the movies! Since we took the APLAC test a couple of weeks ago, and we read The Great Gatsby, my teacher wanted to take us to see the new film adaptation. After reading the book, I wasn’t that impressed; I didn’t understand all the hype surrounding it. Because I didn’t find the book phenomenal, I wasn’t that excited about the movie either… Well until this weekend. My teacher saw the movie ahead of time and she said that it was good, and I heard the same from others. Because of this, I started thinking that maybe it would be better than the book. In honor of this, I decided to do a Gatsby inspired nail look!

DSC05516

DSC05515

https://www.instagram.com/p/ZiFpuOIw0D

The products I used to create this look were:

Gatsby

  • Polishes (left to right): Wet n Wild Ebony Hates Chris, Wet n Wild Fergie Gold Album, and Wet n Wild Fergie Going Platinum
  • A dotting tool
  • A nail striper
  • 1-2 paper reinforcement(s)  (not captured)

Haha! I just realized this looks like I’m being sponsored by Wet n Wild xD

For the designs on my pointer and pinky fingers, I watched this tutorial. Obviously, the tutorial tells you how to do the other fingers, but I didn’t have studs and I didn’t like the rest as much, so I decided to do my own thing. I kept my other fingers pretty simple. For the thumb, I just decided to do a half moon on the bottom of my nail. To do this, I used the paper reinforcement. First, I painted my finger with the gold polish, let it completely dry, cut a piece out of the paper reinforcement (to make it more flexible), placed it on my finger, then painted over it with black. For my middle finger, I did a simple french tip. Then, for my ring finger, I used a dotting tool and wrote the letters “GB.” In reality, I should have done “JG”, but I wasn’t thinking clearly. If you want to use Gatsby’s initials, I would suggest using the font from the poster.

The “JG” in this poster is a major motif in the the movie, for obvious reasons.

So that’s all for this look! It’s not my best, I actually struggled quite a bit, but it was fun! I’ve never really done a “themed” nail look.

Really quickly about the movie! If you didn’t like the book, I think you might still like the movie; I did! It’s not as slow as the book and I felt that the changes they made were smart and helped to further the plot. It also cleared up parts that I didn’t understand when I was reading the book. I cried a little, but I’m a pretty maudlin (that SAT vocab ;)) person. But I actually really liked the movie, though I probably couldn’t watch it all the time.

Okay, that’s all! I gotta get back to work! I hope everyone enjoys the rest of the week and I’ll try to have my Ipsy Bag: May 2013 post up this weekend!

Did you like the movie?

~Melissa